Guide
Importing transactions with a bank feed
Without a bank feed, each reconciliation starts with a statement file: you sign in to your bank, export the transactions, download the file, and upload it to Tax App. A bank feed replaces those steps with a single button.
Who holds what
The connection runs through Akahu, a New Zealand company regulated to provide this service. This is how it works.
You connect your bank to your own Akahu account, at Akahu, using your own internet banking login. Tax App plays no part in that step. It is not on the page and never receives those details. Akahu then gives you two tokens, which you paste into Tax App.
Those tokens allow one thing: reading transactions. They cannot move money, make a payment, or change anything at your bank, because that permission is never given. Tax App stores them encrypted and never shows them again after you save them. You can cancel them at Akahu at any time, without notice and without asking Tax App.
Setting it up
Setting up a feed takes about 10 minutes, is done once, and happens in two places. At Akahu, you connect your bank and get the two tokens. In Tax App, you paste them in. Have your internet banking login to hand for the Akahu part. You type it at your bank, not at Akahu and not in Tax App.
- Create an Akahu account at my.akahu.nz. Akahu asks you to prove your identity and to turn on two-factor authentication, which protects the connection to your bank.
- Connect your bank, still at Akahu. You sign in to your bank through Akahu, as you would in your bank's own app. Tax App takes no part in this step.
- Create a personal app at my.akahu.nz/developers, under any name you choose. The personal app gives you the two values you need: an App ID token, which begins app_token_, and a user access token, which begins user_token_.
- Paste both tokens into Tax App, under Settings, then Bank feeds. Tax App checks them with Akahu before saving anything. So a mistyped or incomplete token is refused straight away, instead of failing later.
- Choose what each account is for: commission or rental, one choice per account. Tax App ignores any account you leave unset, such as a personal account.
Only an owner can connect a feed, and only if bank feeds are switched on for the organisation. The user access token expires after a while. When it does, the app tells you, and you paste a new one into the same screen. Nothing else needs to be set up again.
What arrives
Once a feed is connected, a reconciliation no longer needs a file. Press Import from bank, and every new transaction for the financial year is imported and matched. A later import brings in only transactions that have not already arrived, and leaves existing matches untouched.
You can keep uploading files instead, or do both. A feed import and a CSV upload of the same account describe the same money, and the app knows this. So when the two cover the same period, transactions never appear twice on your statement.
The bank transactions screen
With a bank connected, the app also knows about transactions you have not yet recorded, and lists them for you.
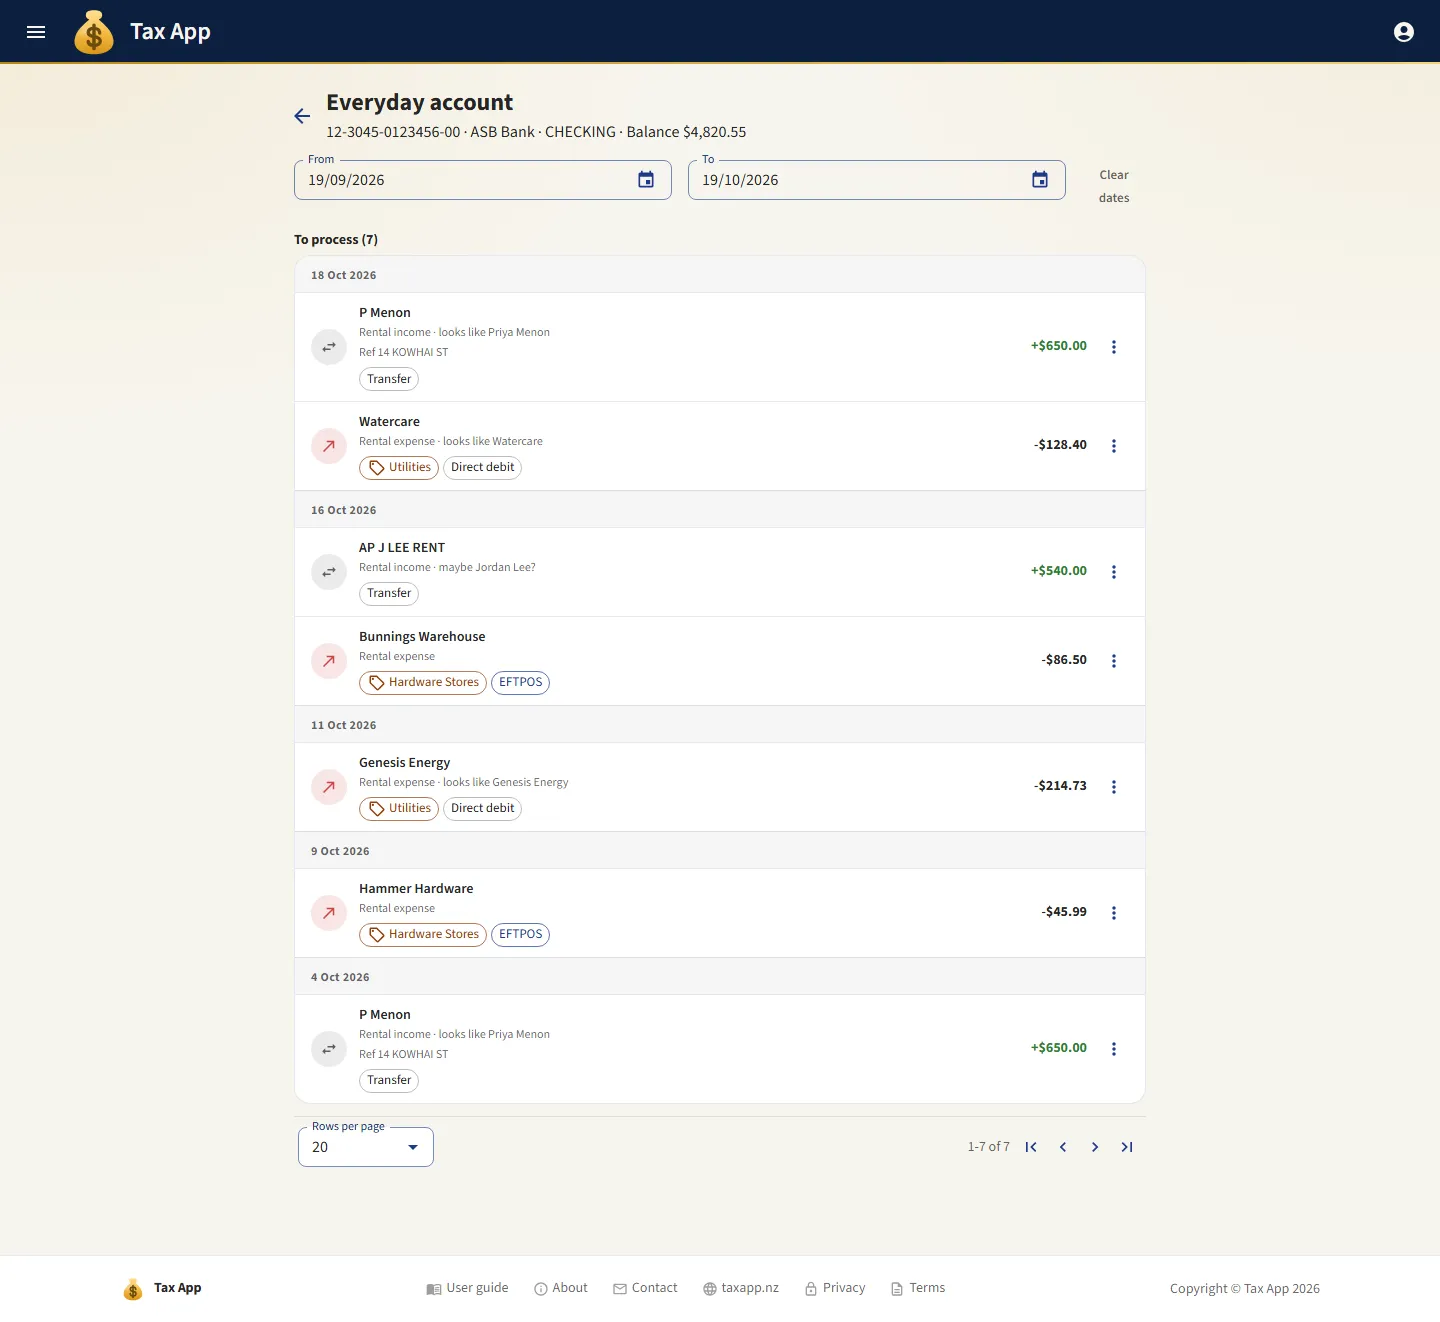
Your connected accounts are listed with their balances and the number of transactions still waiting. Open an account to see this year's transactions that have no record yet, grouped by day, as on a statement.
Each line shows the name of the business instead of the raw statement text, the kind of purchase it seems to be, how it was paid, and the app's best guess at the record it should become, for example "Rental income, looks like Priya Menon" or "Rental expense, looks like Watercare". Where the guess is less certain, it is shown with a question mark.
Each transaction offers two actions. Add opens the usual income or expense form with the details already filled in, and the saved record keeps a link to the transaction it came from. Ignore is for transactions that are not business at all. It moves them to a list at the bottom of the page, where Restore brings one back.
Tap any transaction for its full detail: how it appears on your statement, the business and its logo, the category, the payment type, and the reference, particulars, and code. This is much the same detail your banking app shows, so transactions are easy to recognise.
On your dashboard
A bank feed card on the dashboard shows live balances for the accounts you chose, and a warning when rent for a tenancy looks late or missing.
Where to go next
- Reconciliation: what to do with the transactions once they have arrived.
- Xero: what happens in your accountant's books when you reconcile.